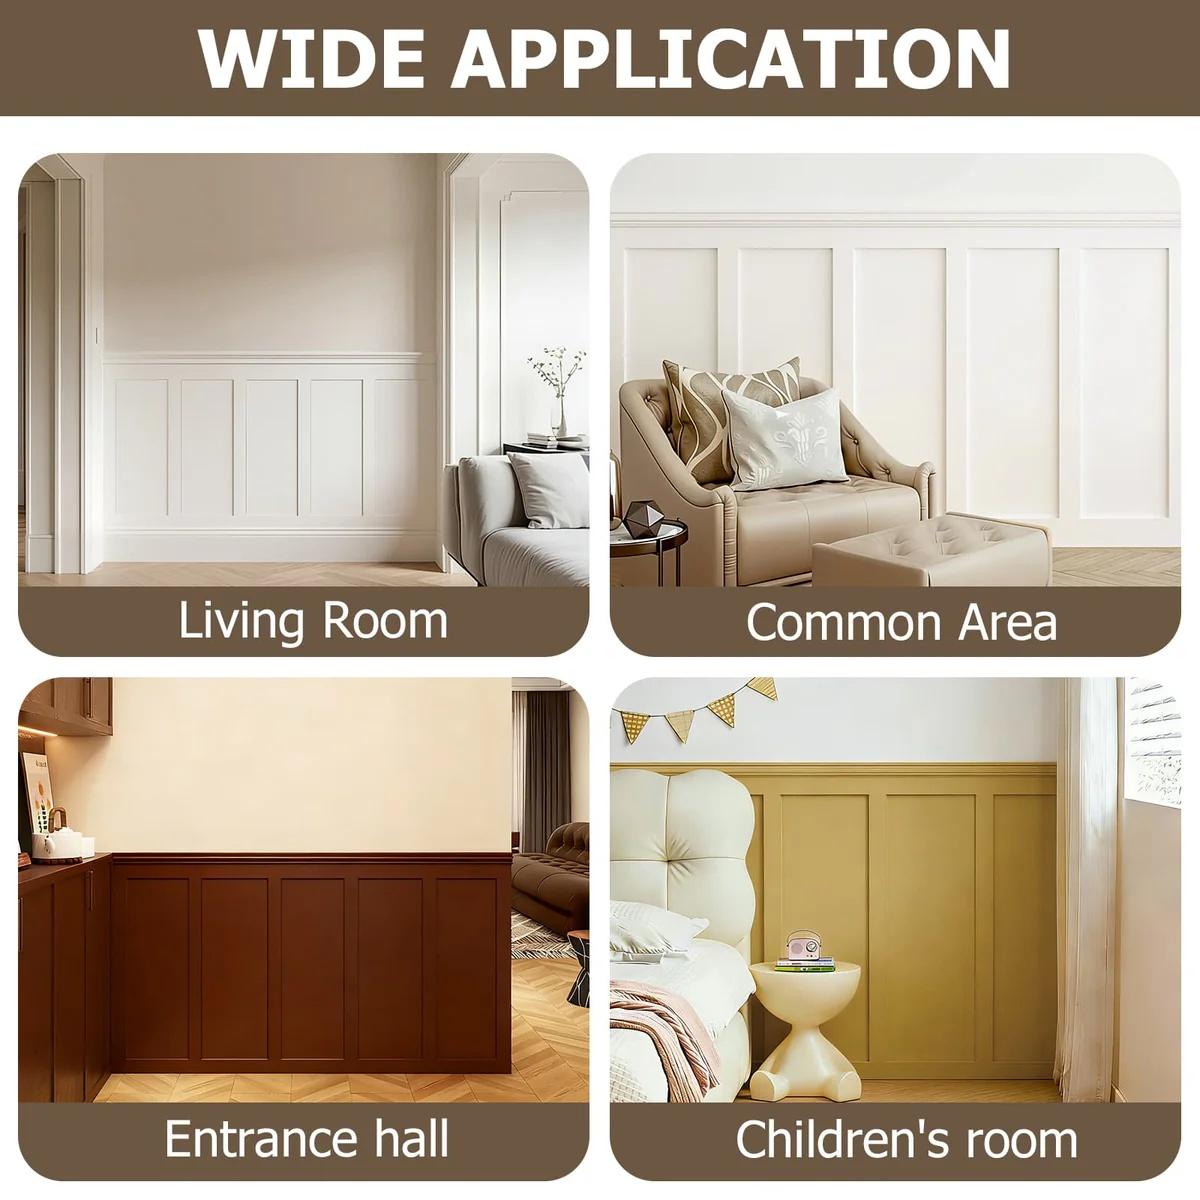
There is a reason certain design combinations never fade from favor. They work too well, speak too clearly, and satisfy something too fundamental to be dismissed by the changing whims of fashion. The pairing of chair rail with picture frame molding is precisely such a combination, a classic duet that has graced the walls of elegant homes for generations. The chair rail provides a horizontal anchor, a clean line that divides the wall into harmonious proportions while protecting plaster from the bumps of daily life. Below it, picture frames create rhythm and interest, a series of rectangles that catch light and shadow in an ever-changing display. Together, they form a composition that feels complete, intentional, and deeply satisfying. The chair rail and picture frame molding kit brings this timeless combination within reach of any dedicated DIYer, offering pre-coordinated components that work together seamlessly. For anyone seeking to add enduring elegance to their home, these kits provide a proven path to beautiful results.
The Historical Significance of Chair Rail
Understanding the enduring appeal of chair rail begins with appreciating its original purpose. In centuries past, dining rooms were active spaces where chairs were constantly pushed back from tables, their tops scraping against walls and leaving marks on delicate plaster finishes. The chair rail emerged as a practical solution, a horizontal band of protection that absorbed these impacts and preserved the wall surface above. Over time, this functional element evolved into something more significant. Designers recognized that the horizontal line created pleasing proportions, dividing the wall into a lower field that could be treated differently from the upper wall. The chair rail became a design element in its own right, a way to add architectural interest while serving its protective function. Today, chair rail continues to offer both practical and aesthetic benefits. It protects walls in dining rooms, hallways, and any area where furniture might make contact. It provides a natural termination point for wainscoting and wall treatments. And it creates visual interest through the simple power of a clean horizontal line, proving that the most enduring designs often arise from the most practical origins.
The Complementary Role of Picture Frames
Where chair rail provides horizontal structure, picture frame molding adds vertical rhythm and visual texture. The frames that populate the lower wall below a chair rail create a series of defined spaces, each one a moment of visual interest that catches the eye and holds it briefly before moving to the next. This rhythm prevents the wall from feeling like an undifferentiated expanse, instead creating a composition that feels deliberately composed. The frames also add depth through shadow play. Depending on the light and time of day, the recessed fields within each frame may appear darker or lighter than the surrounding wall, creating a dynamic quality that flat surfaces cannot achieve. When combined with chair rail, picture frames gain additional meaning. The chair rail provides the top boundary for the frame field, creating a clear termination that makes the composition feel complete rather than arbitrary. Frames that extend from chair rail to baseboard, or from chair rail to a lower rail, establish clear proportions that please the eye through their consistency and balance. Together, these two elements create a wall treatment that feels both structured and rich, disciplined and decorative.
What Your Coordinated Kit Includes
Opening a chair rail and picture frame molding kit reveals a thoughtfully coordinated collection designed for professional results. The primary components include the chair rail itself, typically available in profiles ranging from simple stepped designs to more ornate traditional shapes. This rail will run horizontally around the room at your chosen height, providing the anchor for your entire composition. Alongside the chair rail, you will find the picture frame molding pieces that will create the rectangles below. These come in coordinating profiles that complement the chair rail without competing with it, ensuring visual harmony throughout. The kit also includes corner blocks or connector pieces that simplify the creation of picture frames, eliminating the need for complex mitered cuts. Baseboard or bottom rail pieces complete the lower boundary of your frame field, creating a finished look from floor to chair rail. Many kits include detailed instructions specifically written for installing both elements together, with guidance on proper proportions, spacing, and sequencing. Having all components coordinated from a single source ensures that your finished installation will have the unified appearance of custom millwork.
Planning Proportions for Visual Harmony
The success of a chair rail and picture frame installation depends significantly on getting the proportions right. Begin by determining the height of your chair rail. Traditional installations place the rail at approximately one-third the height of the wall, typically 32 to 36 inches from the floor in rooms with standard eight-foot ceilings. This division creates a pleasing proportion where the lower wall feels grounded and the upper wall feels appropriately lofty. Once chair rail height is established, consider the picture frames that will occupy the space below. The frames should be tall enough to feel substantial but not so tall that they crowd the rail above or the baseboard below. A common approach is to leave a gap of several inches between the top of the frames and the chair rail, and a similar gap between the bottom of the frames and the baseboard. This breathing space prevents the composition from feeling cramped and allows each element to be appreciated individually. Horizontally, frames should be spaced consistently, with gaps between frames typically equal to or slightly less than the gaps at the ends of walls. Take time to sketch your layout and use painter's tape to mock up frame positions, adjusting until the proportions feel balanced to your eye.
Installing Chair Rail with Confidence
With your proportions planned, installation begins with the chair rail, as this element establishes the horizontal line that will guide everything else. Start by marking your chosen chair rail height at several points around the room, then use a long level to connect these marks with a continuous light pencil line. This line must be level around the entire room, regardless of whether your floor is perfectly level, as the eye will perceive any deviation immediately. Once your line is established, begin installing chair rail pieces, starting at one corner and working around the room. For inside corners, you have two options: mitered joints where each piece is cut at 45 degrees to create a seamless corner, or butt joints where one piece meets the other with a simple square cut. Your kit's instructions will recommend the appropriate approach for your specific molding profile. Apply construction adhesive to the back of each piece and press firmly against the wall along your level line, using finish nails for additional security if desired. For long runs, ensure each piece is level before moving to the next, making adjustments while adhesive is workable.

Creating Picture Frames Below the Rail
Once chair rail is securely installed, the creation of picture frames below can proceed. Using your planned layout as a guide, mark the positions of each frame corner on the wall. If your kit includes corner blocks, install these first at each marked position, using a level to ensure they are plumb and aligned with each other. With corner blocks in place, measure and cut the straight molding pieces that will connect them. Each piece requires only a straight cut, as the corner blocks eliminate the need for mitered angles. Apply adhesive to the back of each piece and press firmly into position between the blocks, ensuring tight contact at both ends. For kits without corner blocks, you will create traditional mitered frames by cutting each piece at 45 degrees and joining them at the corners. Whichever method you use, work methodically around the room, completing each frame before moving to the next. Check each frame for level and square as you go, making adjustments while adhesive is workable. The satisfaction of watching your frames take shape, each one perfectly aligned with the chair rail above, is one of the great pleasures of this project.
Finishing for Timeless Elegance
After all molding is installed and adhesive has fully cured, the finishing phase transforms your project from construction to craftsmanship. Begin by inspecting every joint where pieces meet, both at chair rail corners and picture frame intersections. Apply a thin bead of high-quality paintable caulk to any gaps, smoothing with a damp finger to create invisible transitions. This attention to detail is what separates professional-looking installations from merely adequate ones. Allow caulk to dry completely, then lightly sand any rough edges or imperfections. If you used mechanical fasteners, countersink any visible nails and fill holes with wood filler, sanding smooth once dry. Now comes the transformative moment: painting. Your molding arrived pre-primed, ready to accept your chosen color. For timeless elegance, consider painting the chair rail and picture frames the same color as the wall below, allowing shadows to provide definition while maintaining a unified appearance. Alternatively, paint the molding white against a colored wall for crisp contrast that defines the architectural detail. Whatever color you choose, apply paint with care, using a small roller for broad surfaces and an angled brush for the profiles and details. As the paint goes on, watch your walls transform into the kind of timeless interiors that never go out of style, a testament to the enduring power of classic design thoughtfully executed.