Introduction
In today's world, where indoor air quality is becoming increasingly important, HEPA (High-Efficiency Particulate Air) filters have gained significant popularity for their ability to trap tiny particles and allergens, making the air we breathe cleaner and healthier. Regularly changing your HEPA filter is essential to maintain its effectiveness and ensure the air in your home remains pure. In this guide, we'll walk you through the simple steps how to change hepa filter, allowing you to enjoy a breath of fresh air.
Why Change Your HEPA Filter?
HEPA filters are designed to capture particles as small as 0.3 microns, effectively removing allergens, dust, pet dander, and even some bacteria from the air. Over time, however, these filters become saturated with particles, decreasing their efficiency and potentially causing strain on your HVAC (Heating, Ventilation, and Air Conditioning) system. Regularly changing the HEPA filter is essential to maintain optimal air quality and system performance.
Step-by-Step Guide to Changing Your HEPA Filter
Note: Before you begin, consult your appliance's user manual for specific instructions, as the process may vary depending on the device.
Step 1: Gather Necessary Tools and Supplies
Ensure you have the following items handy:
New HEPA filter (make sure it's the right size and model for your device)
Screwdriver (if required for your device)
Cleaning cloth or vacuum cleaner
Step 2: Turn Off Your System
Before you start, turn off your HVAC system to prevent air circulation during the filter replacement process. This will prevent any debris or dust from being pushed into your living space.
Step 3: Locate the Filter Compartment
Depending on the device, the filter compartment may be located in your furnace, air purifier, or HVAC unit. Consult your user manual to find its exact location.
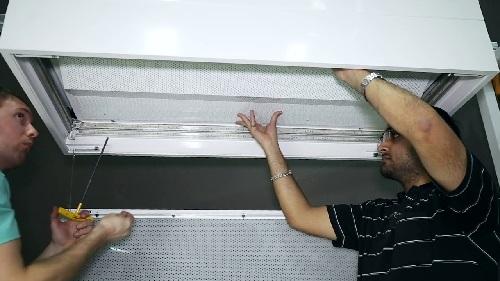
Step 4: Remove the Old Filter
Open the filter compartment carefully. If the filter is behind a cover, remove the cover using a screwdriver if necessary. Gently take out the old HEPA filter, being cautious not to let any accumulated dust or particles fall into the surrounding area.
Step 5: Dispose of the Old Filter
Seal the old filter in a plastic bag to contain the trapped particles, and dispose of it according to your local regulations.
Step 6: Clean the Area
Use a cleaning cloth or a vacuum cleaner to clean the filter compartment, removing any residual dust or debris. This step ensures that your new filter will work efficiently.
Step 7: Insert the New HEPA Filter
Unpack your new HEPA filter from its packaging and insert it into the filter compartment. Make sure to follow any directional arrows or instructions provided on the filter itself or in the user manual.
Step 8: Replace the Cover
If you removed a cover in Step 4, carefully place it back and secure it with screws if necessary.
Step 9: Turn On the System
After securely placing the new filter and ensuring the cover is properly in place, you can turn your HVAC system back on. Enjoy the improved air quality provided by your fresh HEPA filter.
Step 10: Set a Reminder
To maintain consistent air quality, set a reminder to check and change your HEPA filter every 3 to 6 months, depending on the manufacturer's recommendations and the level of usage.
Conclusion
Changing your HEPA filter might seem like a small task, but it can have a significant impact on your indoor air quality and overall well-being. By following these simple steps, you can ensure that your home's air remains clean, allergen-free, and conducive to a healthier lifestyle. Regular maintenance of your HEPA filter not only improves air quality but also extends the lifespan and efficiency of your HVAC system. So, take a deep breath and take charge of your indoor air – your lungs will thank you!