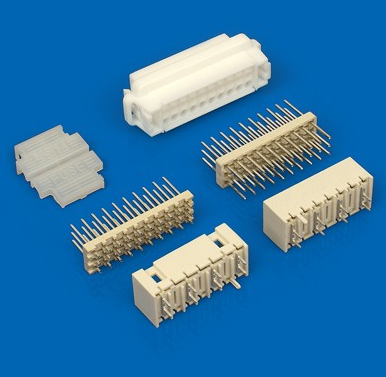
Everyone buys and sells materials all day long. We know hundreds and thousands of connector models, touch them in our hands every day, and distribute them on the road. But do you know how such a small connector is produced? As we all know, a connector is composed of a plastic shell and terminals. So what manufacturing processes are required to manufacture the plastic shell and terminals, and then assemble them into a connector? This article will introduce to you the manufacturing process of the following connectors.
- Stamping
The manufacturing process of electronic connectors generally starts with stamping pins. Electronic connectors (pins) are stamped from thin metal strips using large high-speed stamping machines. One end of the large roll of metal strip is fed into the front end of the stamping machine, and the other end passes through the hydraulic workbench of the stamping machine and is wound into the take-up wheel. The take-up wheel pulls out the metal strip and rolls it to stamp out the finished product.
- Electroplating
After the connector pins are stamped, they should be sent to the electroplating section. At this stage, the connector's electrical contact surfaces are coated with various metal coatings. Problems similar to those in the stamping stage, such as twisting, cracking or deformation of pins, also occur when the stamped pins are fed into the plating equipment. Such quality defects are easily detected using the techniques described in this article.
However, for most machine vision system suppliers, many quality defects that occur during the electroplating process are still within the "forbidden zone" of the inspection system. Electronic connector manufacturers want inspection systems that can detect a variety of inconsistent defects such as small scratches and pinholes on the plating surface of connector pins. Although these defects are easily identifiable on other products (such as aluminum can bottoms or other relatively flat surfaces), they are difficult for visual inspection systems to detect due to the irregular and angled surface design of most electronic connectors. enough images to identify these subtle defects.
Because some types of pins are plated with multiple layers of metal, manufacturers also want inspection systems that can distinguish between various metal coatings to verify that they are in place and in the correct proportions. This is a very difficult task for vision systems using black and white cameras, since the gray levels of images from different metal coatings are virtually identical. Although the color vision system's camera was able to successfully distinguish these different metallic coatings, lighting difficulties remained due to the irregular angles and reflection effects of the coating surface.
- Injection molding
The plastic box holder of the electronic connector is made during the injection molding stage. The usual process is to inject molten plastic into a metal membrane and then quickly cool it into shape. A so-called "leak" occurs when the molten plastic fails to completely fill the membrane. This is a typical defect that needs to be detected during the injection molding stage. Other defects include filled or partially blocked connector holes (these connector holes must be kept clean and clear) In order to correctly connect the pins during final assembly). Since the use of backlight can easily identify missing box seats and blocked connector holes, the machine vision system used for quality inspection after injection molding is relatively simple and easy to implement.
- Assembly
The final stage of electronic connector manufacturing is finished product assembly. There are two ways to connect the electroplated pins to the injection molded box base: separate plugging or combined plugging. Individual plugging means connecting one pin at a time; combined plugging means connecting multiple pins to the box base at the same time. No matter which connection method is adopted, manufacturers are required to detect whether all pins are missing and correctly positioned during the assembly stage; another type of routine inspection task is related to the measurement of the spacing on the connector mating surface.
Like the stamping stage, the assembly of connectors also poses a challenge to the automatic inspection system in terms of inspection speed. Although most assembly lines run at one to two pieces per second, the vision system often completes multiple different inspection items for each connector that passes through the camera. Thus detection speed once again becomes an important system performance indicator.
The above is the production process of connectors. Although there are hundreds of thousands of connector models, the production of connectors generally follows this step. Although we are not professional connector assembly line production workers, it is still necessary to understand the connector production process. As people in the industry who deal with connectors every day, understanding the products is something we all need to do. This article ends here, I hope it helps you.
